Table of Contents
Editing multi-track projects in Descript transforms complicated audio and video editing into a simple process.
The software’s sequence feature keeps all your separate recordings in sync, whether you’re switching between camera angles in a video or editing a podcast with multiple speakers.
This tutorial walks you through the entire process of setting up, editing, and finalizing multi-track projects in Descript, with special attention to its most powerful features for synchronizing and manipulating multiple media tracks simultaneously.
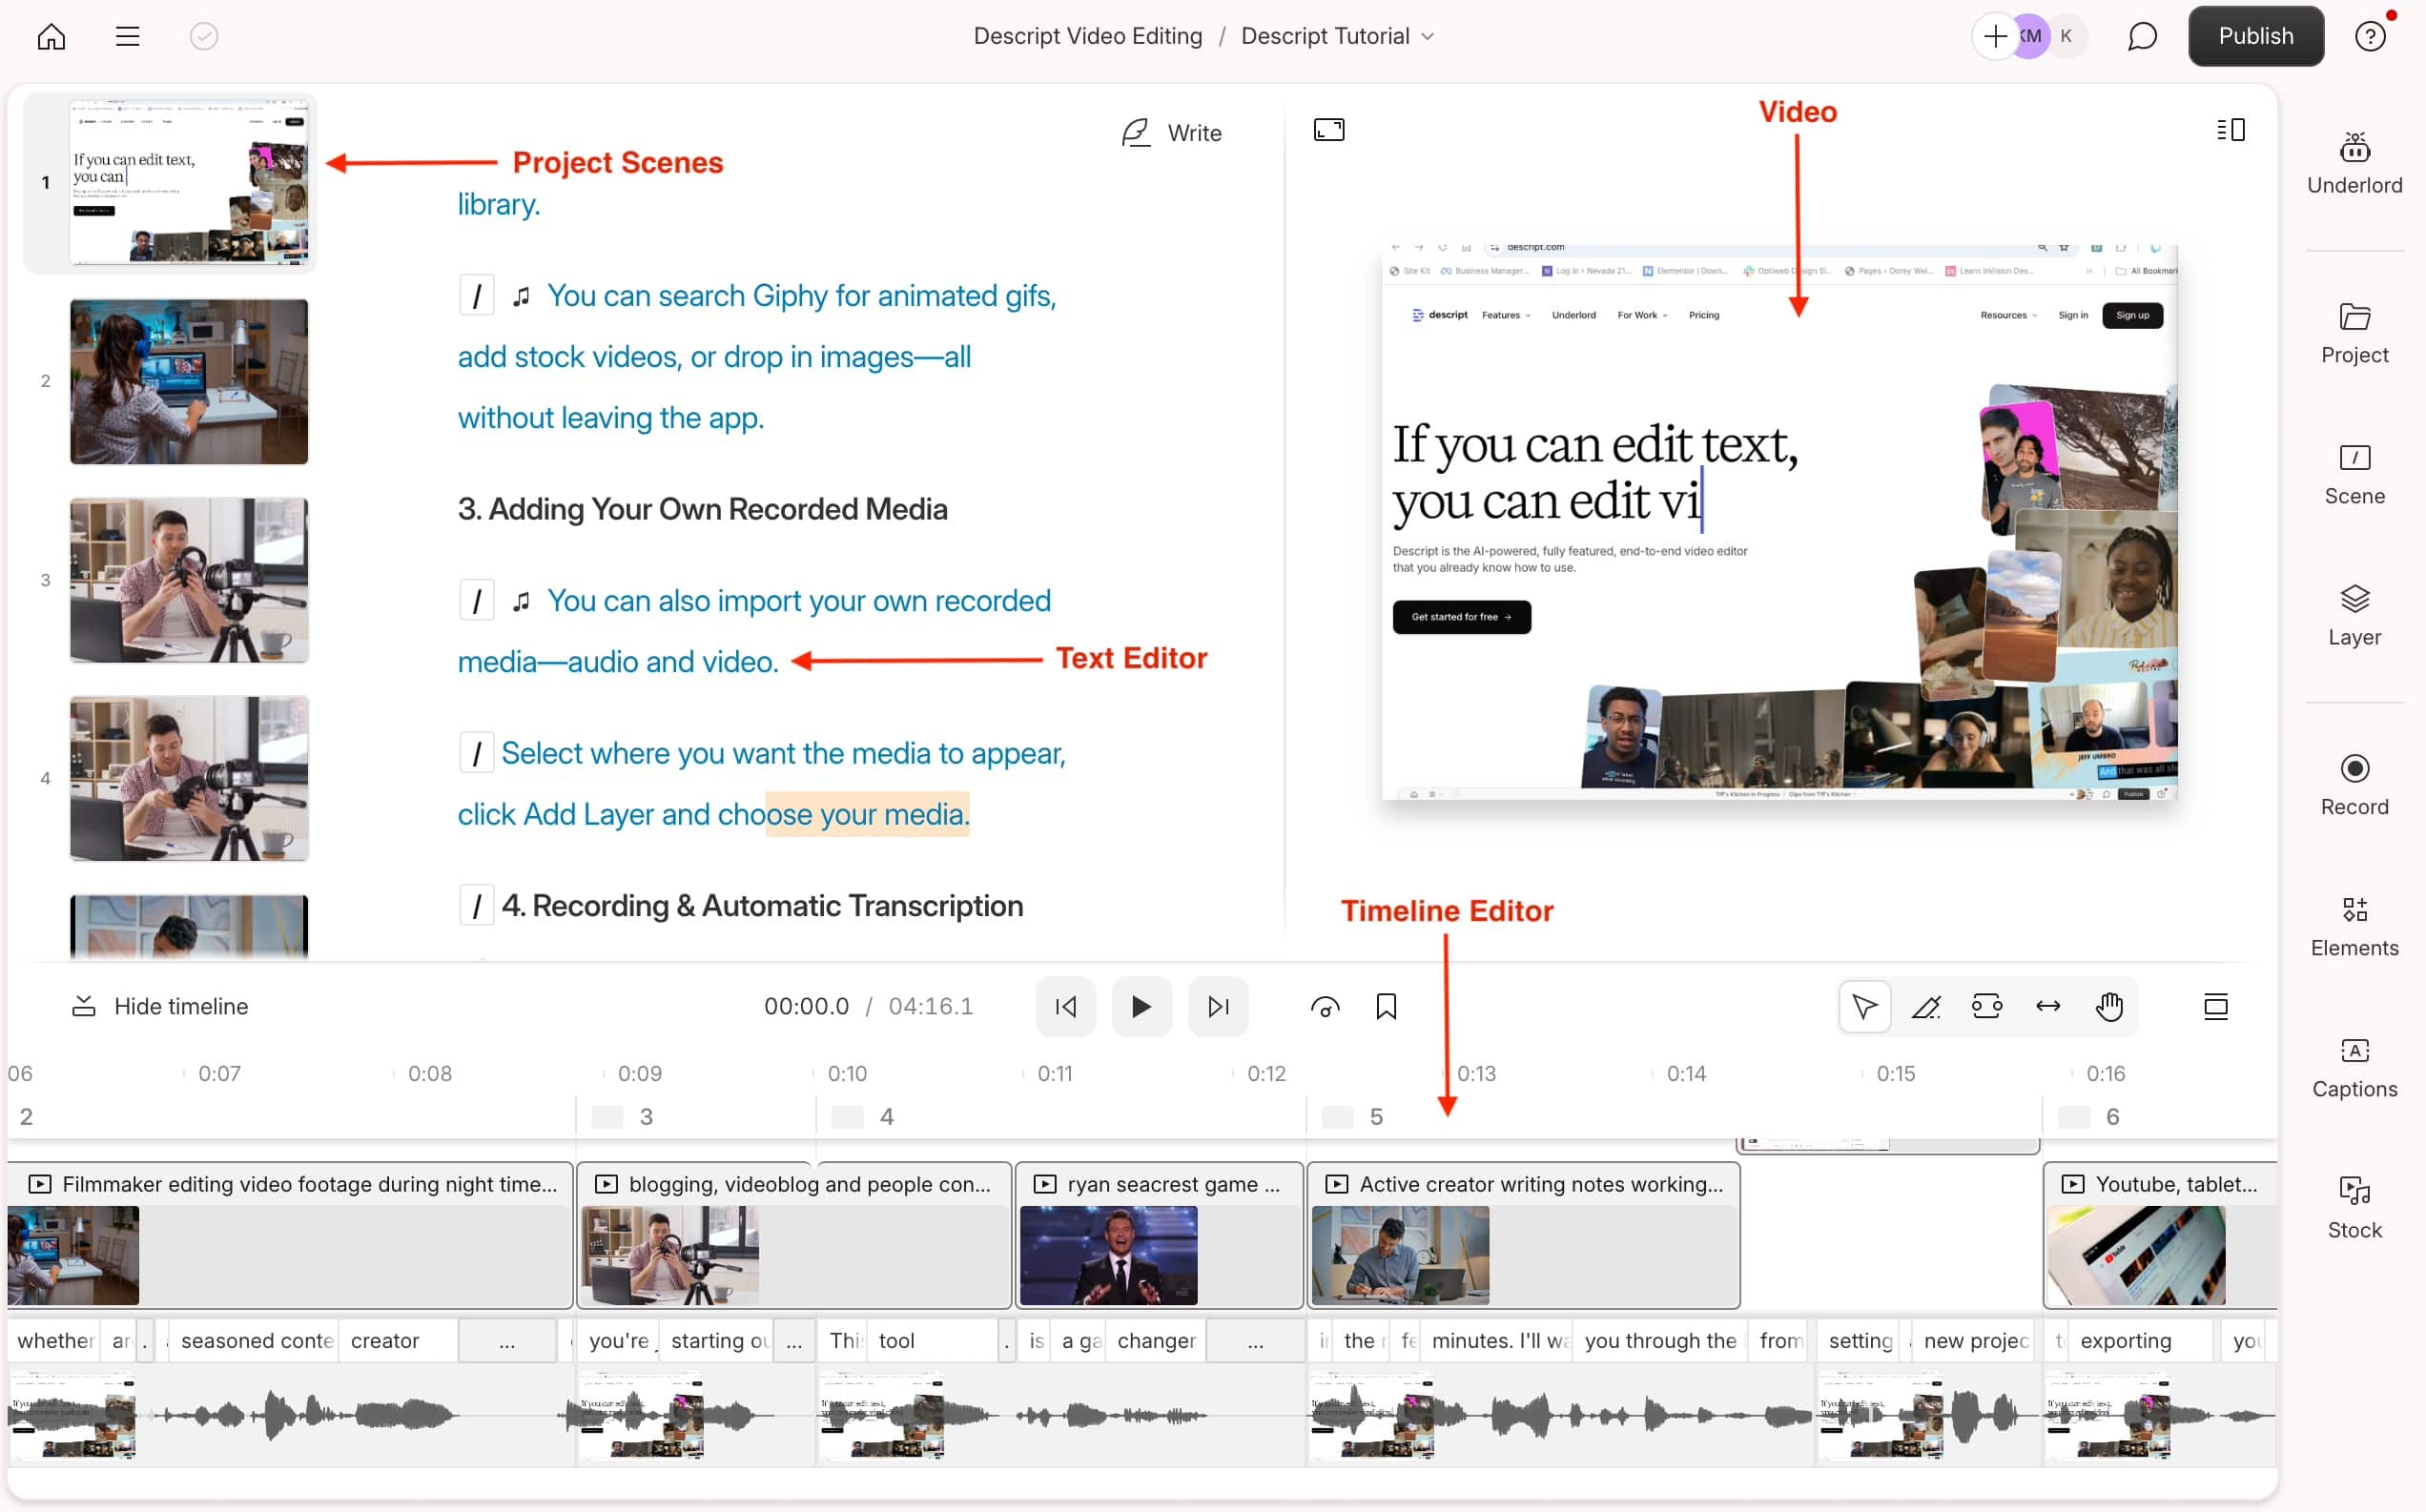
What Are Sequences and Why Do You Need Them?
How Do Sequences Keep My Media Files in Sync?
In Descript, a sequence is a virtual container that groups multiple media tracks together while maintaining their time alignment.
Think of sequences as the glue that binds separate recordings together, making sure that they stay synchronized throughout the editing process.
When you make an edit to one track, all other tracks adjust automatically to maintain their relationship.
This eliminates the tedious work of manually keeping multiple clips aligned, which is valuable when working with interviews, podcasts with multiple microphones, or videos filmed from different angles.
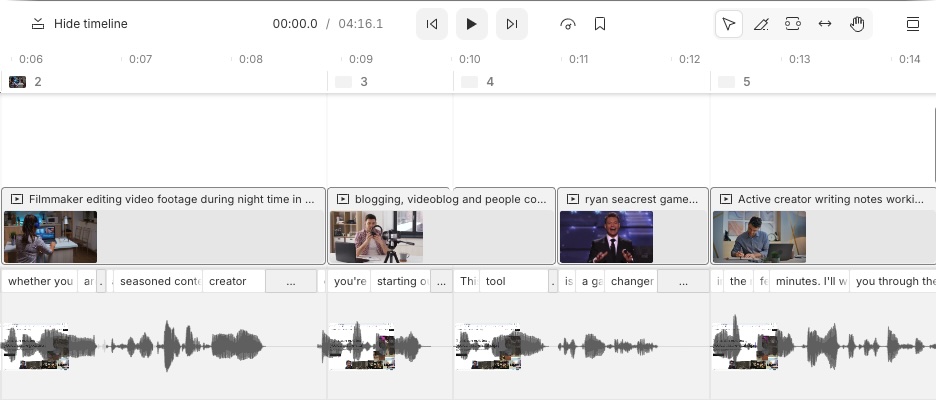
What’s the Difference Between Files, Sequences, and Compositions?
Understanding the relationship between these three elements is essential for effective multi-track editing in Descript.
- Individual files are your raw recordings – whether audio tracks from separate microphones or video clips from different cameras.
- When you group these files together, you create a sequence.
- Finally, when you add a sequence to a script for editing, you’re working with a composition.
This hierarchical structure provides flexibility. The same sequence can be used in multiple compositions, and any edits made to a sequence will automatically apply everywhere that sequence appears.
This means you can create different versions of your project without duplicating work or risking alignment issues.
For instance, you might create one composition for a complete interview and another for a highlight reel, both using the same underlying synchronized recordings.
How Do I Create a Multi-Track Sequence?
What’s the Best Way to Import Multiple Media Files?
When starting a multi-track project, how you import your files matters significantly. The most straightforward approach is to drag and drop all of your media files at the same time into the script area.
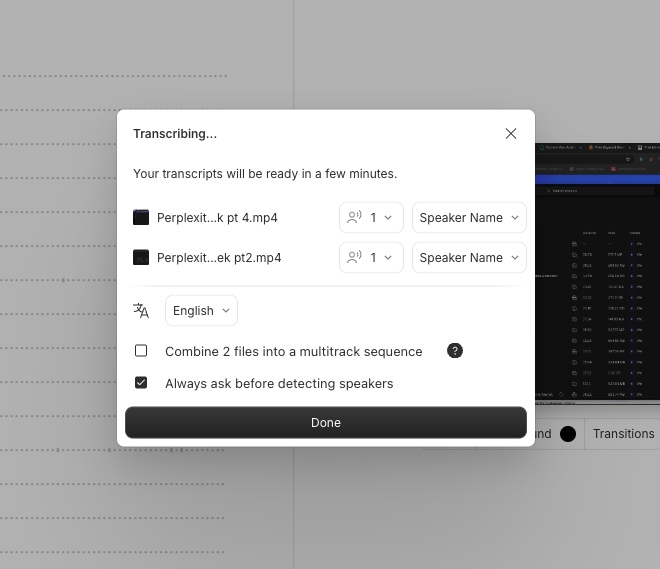
During import, Descript will ask if you want to “Combine into a multitrack sequence.” Selecting this option tells Descript to treat these files as synchronized elements of the same recording session.
You’ll also have the opportunity to label speakers, which helps Descript organize the transcription correctly. This method works best when your recordings naturally align – for example, when you’ve used multiple microphones or cameras during the same session.
The software will handle the transcription of all tracks and present them as a unified script while maintaining their separate identities in the timeline.
How Can I Create a Sequence from Files I’ve Already Imported?
If you’ve already imported your files individually, you can still create a sequence later in your workflow.
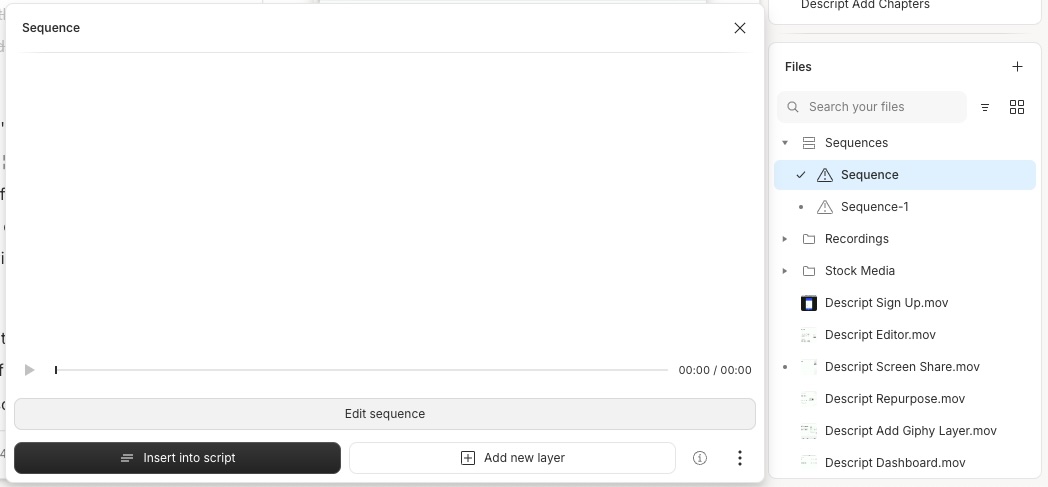
Navigate to the Project panel on the right side of the interface, select all the files you want to include by holding the Ctrl or Command key while clicking each file, then click the “Create sequence” option.
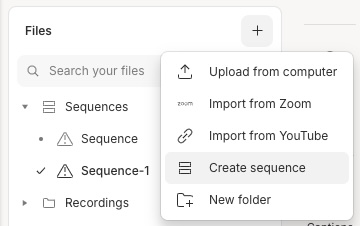
This opens the Sequence Editor where you can make initial adjustments before finalizing your sequence.
This method provides more control over which files to include and allows you to create sequences at any point in your project. It’s helpful when you realize partway through editing that certain files need to stay synchronized, or when you’re adding new recordings to an existing project.
The ability to create sequences at any time ensures you’re never locked into a particular workflow, offering flexibility as your project evolves.
What If I Need to Add More Tracks Later?
For projects where not all content is available immediately, Descript allows you to create an empty sequence first and add tracks as they become available. This approach gives you the ability to build your multi-track project gradually over time.
Creating this structure can help you organize complex projects. Empty sequences serve as placeholders for content that will arrive later. As new recordings become available, you can add them to your existing sequence structure, so that elements maintain synchronization regardless of when they were added.
This method works well for ongoing series where you might record episodes over time but want to maintain the same editing approach across all episodes.
How Do I Use the Sequence Editor?
Where Do I Find the Sequence Editor?
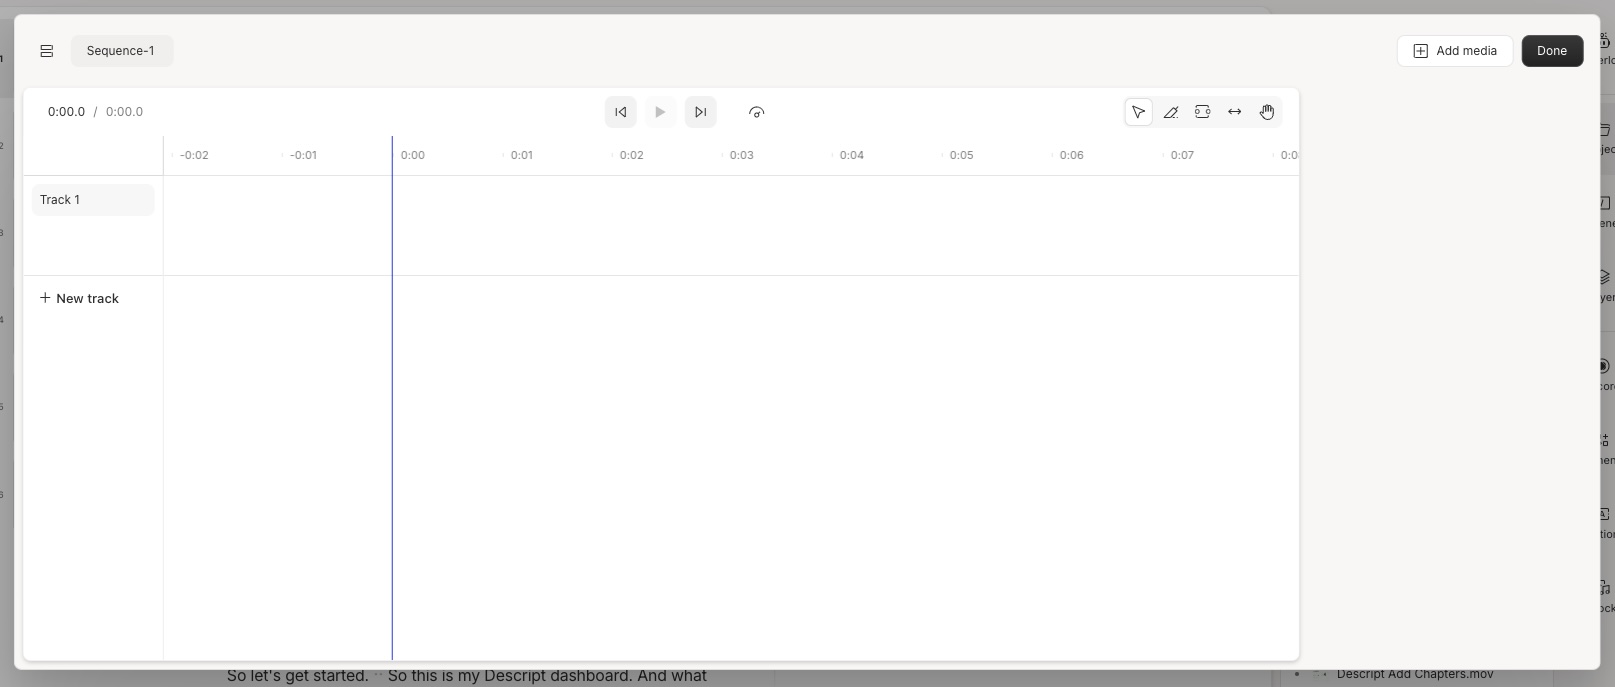
The Sequence Editor is your command center for managing the details of multi-track content. To access it, right-click on a sequence in the Timeline or Script Editor and select “Edit sequence,” or select a sequence in the Project panel and choose the same option. This specialized interface provides detailed control over all tracks in your sequence.
Once inside the Sequence Editor, you’ll see each track displayed separately in a traditional multi-track layout. This view allows for precise adjustments to individual tracks without affecting others.
You can adjust timing relationships between tracks, make edits to specific portions of individual tracks, and fine-tune your project in ways that wouldn’t be possible in the main composition view.
When you’ve completed your adjustments, simply click “Done” in the top right corner or press the Esc key to return to your composition with all changes applied.
How Can I Fix Alignment Issues Between Tracks?
Within the Sequence Editor, you can make various adjustments to ensure perfect alignment between tracks. If recordings didn’t start exactly simultaneously, you can shift tracks in time relative to each other. Look for distinct audio or visual cues that appear in all recordings, such as a clap or distinctive sound, and align these moments across all tracks to establish synchronization.
For example, if one speaker started talking slightly before recording began on another microphone, you can adjust their track positions to ensure proper alignment. Similarly, if there’s unwanted background noise in just one track at a specific point, you can remove that section without creating gaps in other tracks.
The ability to make these precise adjustments while maintaining the overall relationship between tracks is one of the Sequence Editor’s most powerful features for professional multi-track editing.
What Can I Do About Cross-Talk and Audio Problems?
Cross-talk occurs when multiple people speak at the same time, which creates overlapping audio that can be difficult to edit conventionally.
The Sequence Editor is great for addressing these issues by letting you isolate and modify specific portions of individual tracks, while maintaining synchronization. This capability transforms what would be a technical nightmare in traditional editing into a straightforward process.
For instance, if two people are speaking simultaneously and their voices appear on multiple microphones, you can use the Sequence Editor to emphasize the clearer recording of each voice while reducing or eliminating the others.
This selective editing creates much cleaner audio while preserving the natural conversational flow.
The Layer panel within the Sequence Editor also allows you to add effects to individual tracks or control audio levels independently.
What Timeline Tools Should I Use for Multi-Track Editing?
How Does the Select Tool Work with Sequences?
The Select tool is your main instrument for basic editing. In the main timeline, it treats the entire sequence as a unified element, allowing you to move or trim the sequence as a whole.
Within the Sequence Editor, however, the Select tool provides individual control over separate tracks. To use the Select tool with sequences, click on elements in the timeline to select them, drag to move them, or click on the edges to trim content.
For more precise control, open the Sequence Editor where you can select and modify individual tracks without affecting others.
This dual approach gives you both the efficiency of working with synchronized content as a unit and the precision of adjusting individual elements.
When Should I Use the Blade and Range Tools?
The Blade tool creates splits in your content at specific points, while the Range tool selects specific segments for editing. Understanding when to use each tool can significantly improve your editing efficiency.
Blade Tool
Use the Blade tool when you need to create a clean division in your content – for example, to insert a title card between segments or to separate a recording into distinct sections.
When working with sequences, using the Blade in the main timeline creates a cut point that affects all tracks simultaneously, maintaining perfect synchronization.
For more selective cutting, use the Blade within the Sequence Editor to cut individual tracks without affecting others.

Range Tool
The Range tool is useful when you need to select portions of content across all tracks, such as removing a section where all speakers talk over each other or applying an effect to a specific segment across all synchronized tracks.
What Makes the Slip Tool Valuable for Multi-Camera Editing?
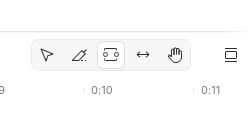
The Slip tool offers a special function for multi-camera projects. It allows you to change which portion of an original recording appears in the timeline without altering its duration or position relative to other tracks.
This maintains synchronization while giving you control over exactly which content is displayed from each camera.
For example, if you have multiple camera angles of the same scene and want to show a different part of one angle without changing its timing relative to other angles, the Slip tool is perfect.
You might use it to adjust which reaction shot appears at a particular moment while keeping everything perfectly in sync with the audio and other camera angles.
This ability to refine which content appears without disrupting synchronization makes the Slip tool particularly powerful for creating professional-looking multi-camera productions.

How Do I Work with Multiple Camera Angles?
How Do I Set Up a Multi-Camera Sequence?
Setting up for multi-camera editing requires special consideration to make sure all angles work together. When creating a sequence for multi-cam editing, include all camera angles as separate video tracks along with any audio tracks.
Descript supports up to 14 sequence tracks, providing enough room for complex camera setups.
The critical factor in multi-cam setup is to have perfect synchronization between all camera angles and audio sources.
If your cameras didn’t use timecode synchronization during recording, use the Sequence Editor to align them manually. Look for distinct visual or audio events that appear in all recordings – a camera flash, a clap, or a distinctive sound – and use these as reference points to align your tracks precisely.
Once properly aligned, your sequence provides the foundation for efficient switching between camera angles throughout your project.
Can Descript Automatically Switch Between Cameras?
One of Descript’s most powerful features for multi-cam editing is its ability to automatically switch between camera angles based on who is speaking. Once your multi-cam sequence is properly set up, you can apply multi-cam switching to have Descript automatically show the camera angle associated with the active speaker.
To setup automatic camera switching, first make sure that each speaker is correctly identified in the transcript and that you’ve assigned the right camera angle to each speaker.
Descript will then handle the switching based on who is speaking at any given moment. Of course, you can always override these automatic selections for more artistic control, using the timeline to manually select which camera appears at specific points.
How Do I Ensure Perfect Audio-Video Synchronization?
Correct synchronization between audio and video is important for professional results, especially when recording devices weren’t linked during production.
Within the Sequence Editor, you can make fine adjustments to ensure that mouth movements align perfectly with speech and that all cameras show consistent timing.
For projects where audio quality varies between cameras, select the best audio source while showing different camera angles. Simply adjust the audio levels of individual tracks in the Sequence Editor, potentially muting lower-quality audio sources entirely while keeping their video available.
This approach gives you the best audio quality alongside visual variety. The ability to mix and match the best elements from each recording device represents one of the most significant advantages of proper multi-track editing.
How Do I Finalize My Multi-Track Project?
What Audio Enhancements Work Best with Multiple Tracks?
Descript offers robust audio enhancement capabilities, including Studio Sound, which can significantly improve recording quality. With multi-track projects, you can apply these enhancements selectively to individual tracks or to the entire sequence, depending on your needs. This also allows for targeted audio improvements.
Apply noise reduction more aggressively to tracks recorded in noisier environments, while using more subtle enhancement for cleaner recordings.
You might also apply different equalization settings to optimize each voice in a conversation, creating a more balanced overall sound.
For instance, a deeper voice might benefit from reduced bass to prevent muddiness, while a higher voice might need enhanced mid-ranges for clarity.
This selective application of audio processing allows you to address the specific requirements of each recording while maintaining a cohesive final sound.
How Do I Export My Finished Multi-Track Project?
After completing your multi-track edit, Descript offers different export options. You can export audio, video, or even transfer your project to other editing software.
When exporting, Descript automatically combines all visible and audible tracks into a single output file, preserving all your editing work.
For projects requiring different versions, create multiple compositions using the same underlying sequence. This allows you to efficiently produce variations without duplicating your editing work.
For example, you might create a full-length version alongside a condensed highlight reel, or versions optimized for different platforms.
Each composition can use the same sequence but present the content differently, with all versions benefiting from your careful synchronization and editing work in the underlying sequence.
What Are Some Advanced Tips for Multi-Track Projects?
How Can I Optimize My Workflow for Complex Projects?
For complex multi-track projects, establishing a consistent workflow significantly increases efficiency.
- Begin by organizing all your media logically before importing.
- Create descriptive names for your sequences and compositions that clearly identify their content and purpose.
This organizational foundation makes it much easier to navigate complex projects as they grow.
Consider creating template sequences for recurring project types.
For instance, if you regularly produce interviews with two cameras and two microphones, save a template with track layouts and settings.
This approach ensures consistency across projects and reduces setup time.
Additionally, make use of Descript’s collaboration features for team projects, allowing multiple editors to work with the same sequences without creating synchronization conflicts.
How Can I Troubleshoot Common Multi-Track Issues?
If you notice synchronization issues after editing, return to the Sequence Editor and verify the alignment of your original tracks.
Look for distinct audio or visual moments that should align across all tracks and adjust as necessary.
Remember that edits made to sequences affect all compositions using that sequence, which can be either an advantage or a complication depending on your project structure.
Use the Layer panel within the Sequence Editor to adjust volume levels of individual tracks, ensuring balanced audio throughout your project.
For video projects, check that automatic camera switching is working as expected by reviewing the timeline and verifying that the correct camera appears when each person speaks.
If automatic switching isn’t producing ideal results, you can always override it with manual camera selections at specific points.
Related Posts
- How to fine-tune video edits in Descript
- How to remove background noise in Descript
- Descript vs CapCut
- How to Optimize Your Browser for Descript Web: Speed, Cache, and Hardware Guide
- How to Use Descript AI Overdub Voices
- How to Edit Multi-Track Projects with Descript’s Advanced Tools
- Transform YouTube Videos into SEO Blog Content with Descript and ChatGPT
- Loom vs Descript: Video Editing and Screen Recording Tool Comparison for 2025
- What kind of projects are best suited for Descript AI Audio Toolkit?
- Descript vs Riverside: A Deep Dive into Features and Usability
Conclusion
Mastering multi-track editing in Descript opens up creative possibilities that would be difficult or time-consuming to achieve in traditional editing software. The sequence-based approach provides both powerful synchronization capabilities and intuitive editing tools that make complex projects manageable even for those without extensive technical experience.
By understanding how to create and manage sequences, work effectively in the Sequence Editor, and utilize Descript’s specialized timeline tools, you can produce professional multi-track content efficiently.
The key to success lies in embracing Descript’s unique workflow. Start by properly organizing your files into sequences, make precise adjustments in the Sequence Editor when needed, and use the timeline tools to refine your edit.
With these techniques, you’ll find that multi-track projects that once seemed overwhelming become straightforward and even enjoyable to create.
Descript’s approach not only saves time but also empowers you to focus on creative decisions rather than technical challenges, resulting in better content with less effort.