Converting videos to text is useful for repurposing content, improving accessibility, and creating searchable transcripts. Descript is a tool that simplifies this process. It turns audio and video files into text quickly. This tutorial explains How to Convert Videos to Text with Descript. This feature is perfect for creators who need accurate transcriptions fast! Get Started for Free with Descript AI
Table of Contents
Why Use Descript for Transcription?
1.1. Key Features of Descript:
- AI-powered transcription: Descript uses advanced technology to quickly and accurately convert spoken words from videos and audio files into written text. This saves a lot of time compared to typing everything out by hand.
- User-friendly interface: Descript is designed to be easy to use, so beginners can get started quickly, and experienced users can work efficiently.
- Integrated audio and video editing: Descript lets you edit both audio and video directly within the transcript. This means you can make changes to your content without needing separate editing software.
1.2. Benefits of Transcribing Videos:
- Improved accessibility and SEO: Transcripts make videos more accessible to people who are deaf or hard of hearing. They also help search engines find and understand your content, which can make your videos easier to discover online.
- Easier content repurposing: You can use transcripts to create blog posts, articles, and social media updates. This helps you share your ideas in different formats and reach a wider audience.
- Enhanced note-taking: Descript is a great tool for turning spoken content from meetings, interviews, or lectures into notes that you can review later. This makes it easier to remember and analyze what was said.
Getting Started with Descript
2.1. Downloading and Installing Descript:
- Where to download: Get Descript from the official website.
- System requirements: Ensure your device meets the minimum requirements for smooth operation.
- Installation steps: Download the installer, run it, and follow the prompts to complete the setup.
- Get Started for Free with Descript AI
2.2. Setting Up Your Account:
- Creating a new account: Sign up with your email or use an existing account like Google or Apple.
- Choosing the right plan: Compare the free and paid features to find the plan that suits your needs.

2.3. Overview of Descript Interface:
- Navigating the Dashboard: When you open Descript, you’ll see the main dashboard. This is where you can access all your projects and start new ones. It helps you stay organized and find the files you need quickly.
- Key Sections:
- Media Library: This is where all your audio and video files are stored. You can easily drag and drop files into the library and organize them for your projects.
- Transcript Editor: This section shows the text version of your audio or video. You can click on words in the transcript to jump to that part of the video, making it easy to correct mistakes or edit the content.
- Composition Panel: This panel lets you combine different parts of your project, like clips and text, to create a final version. It’s where you can put everything together and see how your project looks as a whole.
Importing Videos into Descript
3.1. Supported File Formats:
- Common formats: Descript supports video formats like MP4 and MOV.
- Tips for optimal quality: Use high-resolution videos with clear audio for the best transcription accuracy.
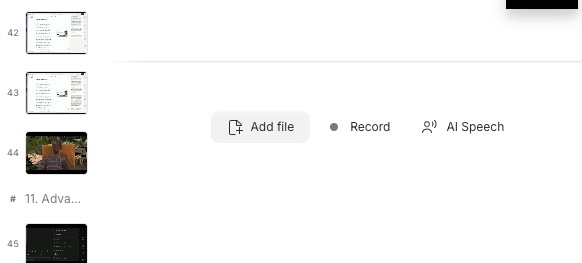
3.2. Step-by-Step Import Process:
- Drag-and-drop method: Simply drag your video file into the Descript workspace.
- Using the ‘Add File’ button: Click the button, select your file, and import it directly into your project.
3.3. Organizing Your Project:
- Naming conventions: Use clear and consistent names for your files to keep track of content.
- Creating folders and compositions: Set up folders and compositions to organize large projects efficiently.

Transcribing Videos to Text
4.1. Automatic Transcription:
- How to initiate automatic transcription: Once your video is uploaded, Descript will automatically start transcribing. You can also manually start the process by selecting the file and clicking on the “Transcribe” button.
- Estimated time for different video lengths: The transcription time depends on the length of the video and the clarity of the audio. Typically, a 30-minute video might take around 5 minutes to transcribe.
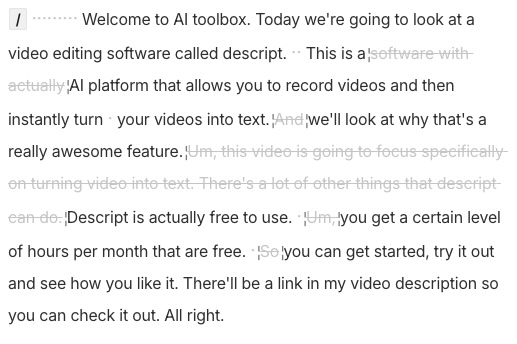
4.2. Editing the Transcript:
- Navigating the transcript editor: Use the left panel to view the transcript and the right panel for video playback. The transcript editor allows you to click on any word to jump to that part of the video.
- Correcting transcription errors: Click on the word that needs correction, type the correct word, and hit enter. Descript will automatically update the text and audio alignment.
- Using shortcuts for faster editing: Utilize keyboard shortcuts like ‘Cmd + F’ (Mac) or ‘Ctrl + F’ (Windows) for quick word replacement, and ‘E’ to edit the selected text.
4.3. Speaker Identification:
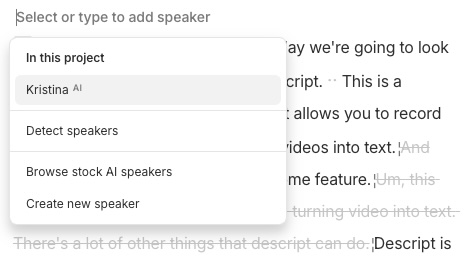
- Adding speaker labels: Assign speaker labels by clicking on the label icon next to the text and selecting the speaker name. This helps distinguish between different speakers in multi-person conversations.
- Correcting speaker mismatches: If Descript misidentifies speakers, click on the speaker label and choose the correct one from the dropdown menu.
For those interested in exploring more advanced features like voice cloning with Descript AI, check out this comprehensive guide to see how you can create a custom voice for Overdub and enhance your editing capabilities.
Advanced Editing Features
5.1. Overdub:
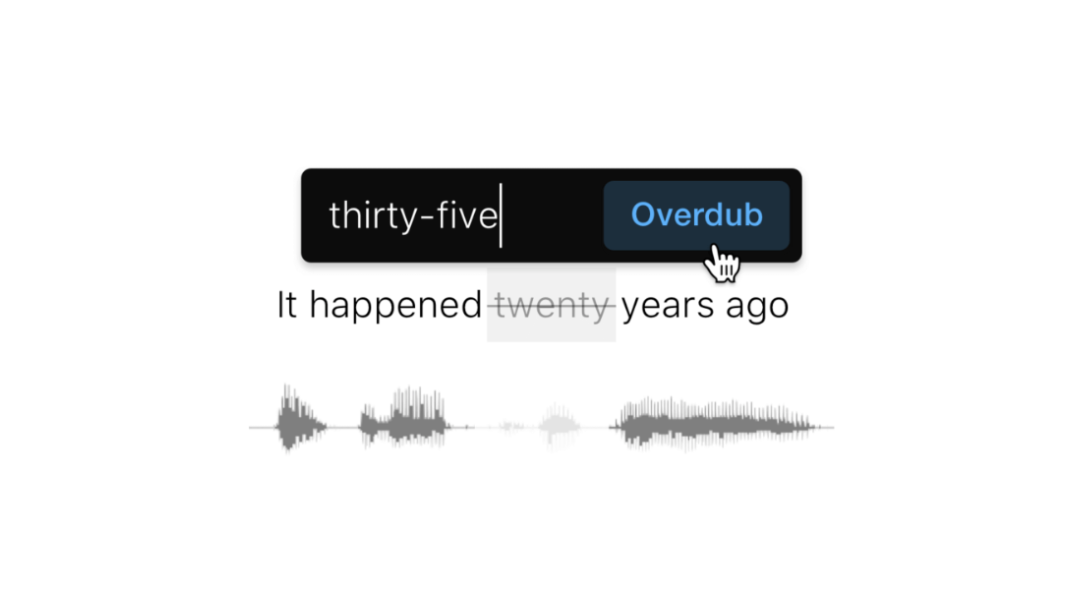
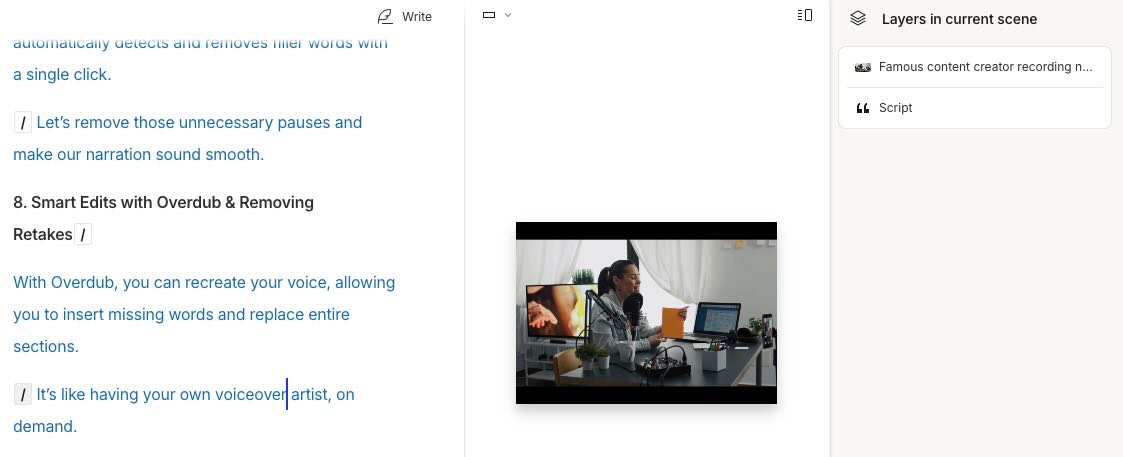
- How to Replace or Add Missing Words: Overdub allows you to easily correct or add words in your audio without re-recording. Simply type the word you want to change or add in the transcript, and Descript will generate a new audio clip with the correct wording.
- Creating a Custom Overdub Voice: You can create a unique voice model by recording a few minutes of your voice. This custom voice can then be used to make edits that sound like you, maintaining a natural flow in your audio.
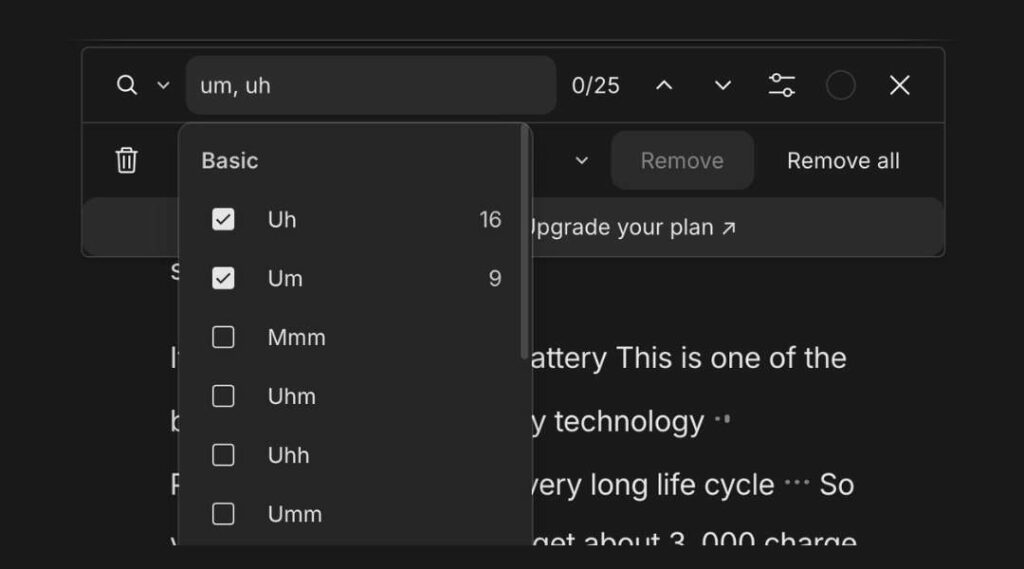
5.2. Filler Word Removal:
- Automatically Removing “Umms,” “Uhhs,” etc.: Descript can automatically detect and remove common filler words from your audio, helping your content sound more polished and professional.
- Manual Removal and Adjustment: If you prefer more control, you can manually review the transcript and delete specific filler words or adjust the timing to make the audio sound smooth.
5.3. Multitrack Editing:
- Working with Multiple Audio/Video Tracks: Descript supports multitrack editing, allowing you to work with several audio or video tracks at once. This is useful for projects like podcasts or interviews where there are multiple speakers.
- Syncing Transcript with Media: You can synchronize the transcript with different media tracks, ensuring that the text matches the audio and video precisely, even if you make changes to the project later.
Exporting the Transcription
6.1. Export Formats:
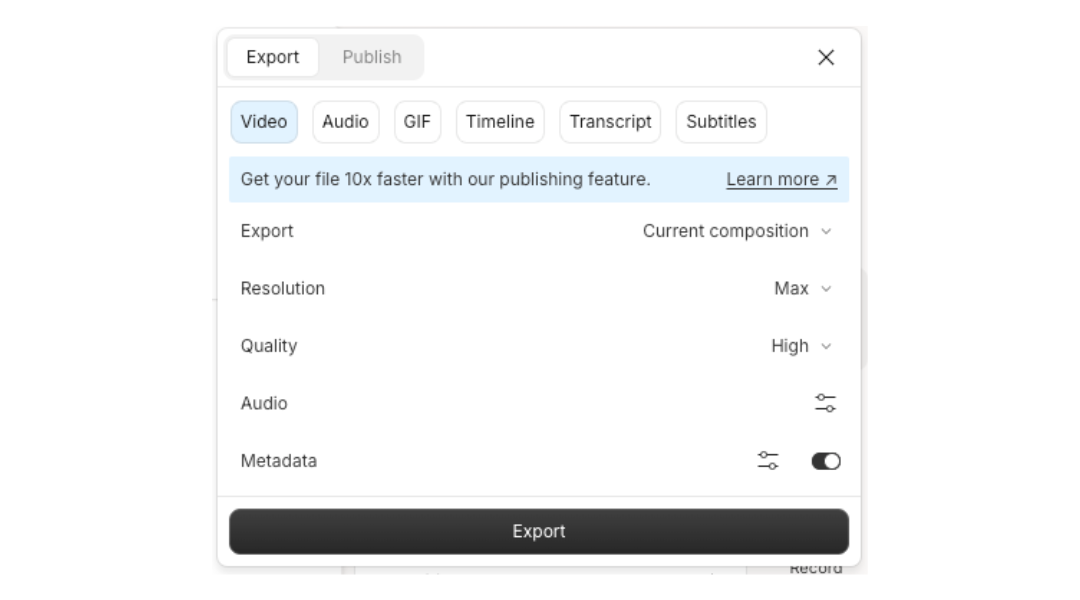
- Available Formats: Descript allows you to export your transcription in various formats, such as TXT, DOCX, PDF, and SRT. Each format serves a different purpose:
- TXT is useful for simple text files without any special formatting.
- DOCX provides a more polished document format, ideal for sharing or further editing in word processors.
- PDF preserves the formatting and is perfect for sharing read-only documents.
- SRT is used for creating subtitles and captions for videos.
- Choosing the Right Format for Your Needs: Consider what you will use the transcript for. For example, use DOCX if you need to edit it further or SRT for adding subtitles to videos.
6.2. Export Settings:
- Including Timestamps and Speaker Labels: You can choose to include timestamps to show when each part of the transcript occurs in the audio or video. Adding speaker labels helps identify who is speaking, which is particularly useful for interviews or multi-speaker projects.
- Adjusting Text Formatting: Descript offers options to customize the appearance of your transcript. You can adjust font style, size, and layout to suit your preferences or match the format requirements of your project.
6.3. Exporting to Other Platforms:
- Direct Export Options: Descript allows you to export your transcripts directly to cloud storage services like Google Drive or Dropbox. This is convenient for backing up your files or sharing them with others.
- Integration with Other Tools: You can also integrate Descript with platforms like WordPress, making it easier to publish transcripts as blog posts or articles without additional steps.
Tips and Best Practices
7.1. Improving Transcription Accuracy:
- Ensuring Good Audio Quality: Clear audio is essential for accurate transcription. Record in a quiet environment and avoid background noise, such as traffic or air conditioning, which can interfere with the clarity of the recording.
- Using External Microphones and Reducing Background Noise: External microphones generally provide better sound quality than built-in ones. Position the microphone close to the speaker and use noise-reduction features or software to minimize unwanted sounds.
7.2. Efficient Editing Techniques:
- Utilizing Keyboard Shortcuts: Descript offers a variety of keyboard shortcuts that can speed up your editing process. For example, use shortcuts to navigate through the transcript, play or pause audio, and quickly make corrections.
- Setting Up Custom Workflows: Organize your projects by creating templates or preset workflows in Descript. This includes setting up common editing steps, like filler word removal and speaker labeling, to streamline your process and ensure consistency across different projects.
7.3. Leveraging Descript for Content Creation:
- Converting Transcripts into Blog Posts: Use your transcripts as a foundation for blog posts. You can easily edit the text to create well-structured articles that expand on the topics discussed in the video or audio content.
- Creating Social Media Snippets: Highlight key points or memorable quotes from your transcript to create short clips or text-based posts for social media. This helps you engage your audience and promote your content across different platforms.
Troubleshooting Common Issues
8.1. Poor Transcription Quality:
- Common Causes and Solutions:
- Low-Quality Audio: Background noise, echo, or unclear speech can lead to inaccurate transcriptions. Use a good-quality microphone and record in a quiet environment to improve audio clarity.
- Multiple Speakers Talking at Once: If speakers overlap or interrupt each other, the AI may struggle to differentiate voices. Encourage speakers to take turns, and use the speaker identification feature to label each person correctly.
- Accents or Unusual Vocabulary: Strong accents or uncommon terms can cause errors. You can manually correct these in the transcript editor or provide a custom vocabulary list to the transcription tool, if available.
8.2. Syncing Problems:
- How to Manually Sync Transcripts:
- Re-Syncing with the Playback: If the text and audio/video are out of sync, select the point in the transcript where the issue starts and align it with the corresponding moment in the media file.
- Adjusting Sync Points: Use the “Re-align Text” feature to adjust the timing of specific sections. You can also manually drag the text segments in the transcript to match the correct timing.
- Checking for Gaps: Ensure there are no missing parts in the audio or video that could cause the transcript to desynchronize.
8.3. Export Errors:
- Resolving Format and Compatibility Issues:
- Unsupported Format: Check that you are exporting in a format supported by your destination platform (e.g., SRT for subtitles, DOCX for document sharing). If an export fails, try converting the file to a compatible format using third-party software.
- File Size or Length Limits: Some platforms may have restrictions on file size or length. Split large transcripts into smaller sections or reduce the file size by adjusting the formatting settings.
- Encoding Errors: If the exported text appears garbled or unreadable, try changing the text encoding settings during export to a standard like UTF-8 to ensure compatibility.
Resources:
Video Transcription Best Practices
Benefits of Transcribing Video Content
AI in Video Editing and Transcription
Improving Video Quality for Transcription
SEO Benefits of Video Transcription
Disclaimer: This article may contain affiliate links. If you make a purchase through these links, I may earn a commission at no additional cost to you. Your support helps me continue to create valuable content.